

Common Mistakes to Avoid in Prusa Slicer
Prusa Slicer has become one of the most popular 3D printing slicing software due to its versatility, reliability, and extensive customization options. However, even experienced users can make mistakes that affect print quality, efficiency, and overall success. Understanding these pitfalls is essential for both beginners and seasoned 3D printing enthusiasts. In this article, we explore common mistakes to avoid when using Prusa Slicer, ensuring your prints are precise, strong, and visually appealing.
Ignoring Proper Printer and Filament Settings
One of the most common mistakes in Prusa Slicer is neglecting to configure the printer and filament settings properly. Users often rely on default profiles without considering the specific characteristics of their 3D printer or the filament they are using. Every printer has its nuances, and filaments vary in properties such as melting point, flexibility, and adhesion behavior. Incorrect settings can lead to warping, stringing, under-extrusion, or poor layer adhesion, ultimately compromising the quality of your prints.
Prusa Slicer provides preconfigured profiles for popular printers and filaments, but these should only serve as a starting point. Users must adjust settings like nozzle temperature, bed temperature, layer height, and print speed based on their specific combination of printer and filament. Regularly calibrating your printer and performing test prints with new filaments can prevent printing failures and ensure optimal results. Skipping this step is a mistake that can turn a simple print into a frustrating learning experience.
Overlooking Layer Height and Resolution Choices
Choosing the right layer height is crucial for both print quality and speed. Many users make the mistake of setting the layer height too high to reduce print times or too low, unnecessarily extending the duration of the print. Layer height affects not only the resolution of the model but also the adhesion between layers. A layer height that is too high may produce visible gaps and weak points, while too low a height may lead to excessive stringing and longer prints without noticeable improvements in detail.
Prusa Slicer allows users to select different print quality levels, ranging from coarse to ultra-fine. Understanding the relationship between layer height, nozzle diameter, and desired model detail is essential. For functional parts, slightly higher layer heights may be acceptable, while detailed models, miniatures, or decorative prints benefit from finer layers. Avoiding inappropriate layer height selection ensures a balance between print quality, structural integrity, and print efficiency.
Neglecting Support Structures
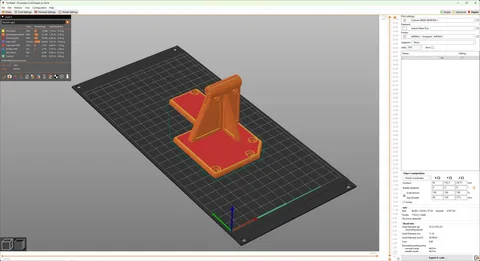
Support structures are necessary for overhangs, bridges, and complex geometries. A common mistake in https://prusaslicerdownload.com/ is either ignoring supports entirely or applying them incorrectly. Without proper supports, overhanging features may sag, warp, or even fail mid-print. On the other hand, excessive or misplaced supports can make post-processing tedious, leaving unsightly marks or damaging delicate sections during removal.
Prusa Slicer offers multiple options for generating supports, including grid, lines, or organic patterns, as well as settings for density and overhang angle. Users should carefully analyze their model and experiment with support configurations for optimal results. Learning how to strategically place supports minimizes material usage while ensuring structural integrity. Avoiding supports or using default settings without consideration can compromise your prints and waste both filament and time.
Mismanaging Print Speed and Acceleration
Print speed and acceleration settings are crucial for achieving consistent print quality, yet they are frequently overlooked. Setting speeds too high can lead to vibrations, ringing, or layer misalignment. On the other hand, extremely slow prints may be more precise but unnecessarily increase the time required for a model. Balancing speed with print stability is an art that every Prusa Slicer user should master.
Prusa Slicer allows for fine-tuning of speeds for different print phases, such as perimeters, infill, and travel movements. Acceleration and jerk settings can also be adjusted for smoother motion and improved detail. Users often make the mistake of keeping all speeds at default values, which may not be ideal for their specific printer or model. Understanding how to optimize these parameters ensures cleaner edges, better layer adhesion, and efficient print times, avoiding frustrating mistakes caused by improper speed management.
Ignoring Slicing Previews and Simulation
Skipping the slicing preview is a mistake that many users make in their rush to start printing. Prusa Slicer provides a detailed layer-by-layer preview that allows you to inspect how your model will be printed. Ignoring this feature can result in unexpected gaps, missing layers, or poor support placement, often leading to print failures that could have been easily prevented.
The simulation feature in Prusa Slicer highlights potential issues such as excessive retractions, under-extrusion zones, or unsupported overhangs. By carefully reviewing the slicing preview, users can detect errors, adjust settings, and avoid wasting filament and time. Developing the habit of previewing each sliced model before printing reduces mistakes, improves print quality, and ensures a smoother 3D printing experience. Neglecting this step is one of the simplest yet most critical errors to avoid.
Conclusion
Prusa Slicer is a powerful tool for achieving high-quality 3D prints, but mistakes can easily compromise results. Common pitfalls include ignoring proper printer and filament settings, overlooking layer height and resolution choices, mismanaging support structures, improper print speed and acceleration, and neglecting slicing previews. By being aware of these mistakes and taking proactive steps to address them, users can optimize their 3D printing workflow and achieve reliable, professional-quality results.
Consistency, attention to detail, and regular calibration are key to mastering Prusa Slicer. Avoiding these errors will not only save time and filament but also enhance the overall 3D printing experience. Whether you are a beginner experimenting with your first prints or a seasoned user tackling complex projects, adhering to best practices in Prusa Slicer ensures every print is a success.