


The Complete Guide to Cleaning Wide-Slab Tiles Without Residue
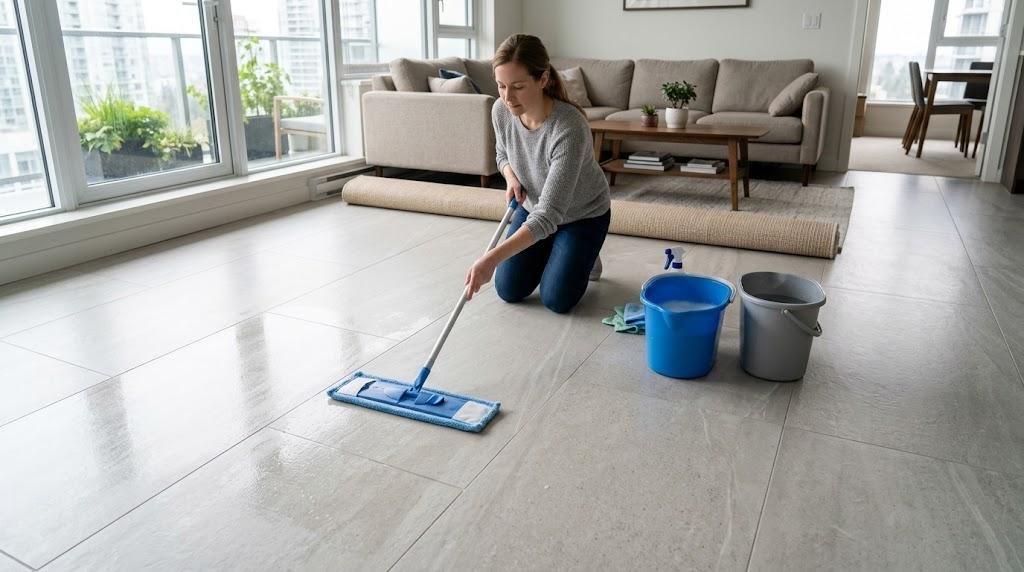
There is an undeniable appeal to flooring composed of oversized panels. The minimal grout lines and expansive surfaces bring a sense of calm and sophistication to any room. But the visual reward comes with a maintenance challenge that catches many people off guard. Every mop session seems to leave behind a translucent film or a pattern of streaks that only becomes visible once the surface is dry.
This outcome is not a reflection of your effort. It is a direct consequence of using cleaning methods designed for smaller tiles on a surface that behaves very differently. A few targeted adjustments will change your results dramatically.
Understanding the Mechanics of Streaking
The explanation is rooted in how water interacts with uninterrupted surface area. Traditional twelve-inch tiles feature grout channels spaced at regular twelve-inch intervals. Those channels capture moisture before it can spread across a wide plane. Think of them as miniature gutters embedded throughout the floor.
When the floor is composed of large format tiles — panels that measure 24 by 48 inches or even larger — those drainage breaks are few and far between. Cleaning solution pools across hundreds of square inches of smooth surface. As the water slowly evaporates, dissolved minerals and surfactants settle into a visible residue.
Tile finish amplifies the effect. Glossy panels reflect light in a way that exposes every imperfection. Matte panels hide surface debris more readily but cling to product buildup with surprising persistence.
Building Your Cleaning Toolkit
Effective maintenance does not demand specialized machinery. It calls for a handful of carefully chosen implements that work in concert.
A flat microfiber mop is the most important investment. The tightly woven fibers create thousands of tiny contact points that pull soil upward and lock it in place. A traditional cotton string mop does the opposite — it soaks up dirty water and redistributes it across the floor with each pass.
You will also need two separate buckets for the double-bucket method. Reserve one for your diluted cleaning solution and the other for rinse water only. Commercial cleaning crews rely on this approach because it prevents the mop from carrying contaminated water back onto clean surfaces.
A pH-neutral hard-surface cleaner rounds out the kit. Visit a ceramic tile shop that carries products specifically designed for stone and tile care. General-purpose cleaners, bleach, and ammonia-based solutions tend to strip surface treatments and leave behind their own chemical film, compounding the very problem you are trying to solve.
The Cleaning Protocol
Step 1: Begin With Dry Debris Removal
Introducing water to a dusty floor is the most common setup for failure. The moisture bonds with fine particles, creating a thin slurry that settles into grout lines and surface texture as it dries.
Use a vacuum set to hard-floor mode. Turn off the rotating brush roll entirely. Spinning bristles can etch fine scratches into polished finishes that accumulate over time. Sweep along baseboards and in corners where fine grit collects undetected.
Step 2: Measure Your Cleaner Precisely
Over-concentration is the leading cause of post-cleaning haze. The surfactants that clean effectively at the recommended dilution become a stubborn, visible film when over-applied.
Read the product label and measure accordingly. The standard ratio is roughly two ounces per gallon of warm water. Warm water outperforms cold because it dissolves oily residues more readily. Fill one bucket with the diluted solution and the other with plain warm rinse water.
Step 3: Apply With Restrained Moisture
Dampen your mop in the cleaning solution and wring it thoroughly. The mop should feel only slightly moist. Standing water on wide-surface flooring is the primary driver of streak formation.
Divide the room into zones approximately four feet on each side. Guide the mop in continuous figure-eight strokes to maintain edge contact and avoid pushing dirty water into ridges. Rinse and reload the mop head between each zone.
Step 4: Dry Every Section by Hand — the Essential Finishing Move
Allowing the surface to air-dry is the single most common cause of visible streaks. As water evaporates, it concentrates dissolved material in place, creating the haze you see after the floor appears clean.
Immediately after mopping each zone, switch to a dry microfiber pad and wipe the same area. This captures the residual moisture film before evaporation has a chance to deposit minerals or surfactant traces on the surface. Expect to use three to four dry pads during a full-room session. That volume indicates thoroughness, not excess.
Correcting Floors With Pre-Existing Haze
Clouded flooring is correctable. The solution depends on what caused the buildup.
Soap residue responds to repeated treatment with hot water alone. Mop the floor using nothing but clean hot water, changing the rinse bucket frequently. Two or three full passes usually dissolve and remove the accumulated surfactant layer.
Mineral deposits from hard water require a mild acid. Mix equal parts distilled white vinegar and warm water. Apply to the affected area and allow one minute of dwell time. Agitate with a microfiber pad, rinse thoroughly, and dry immediately. Limit this treatment to occasional deep cleans. Regular vinegar exposure degrades grout joints over time.
Grout haze from recent installation calls for a purpose-formulated grout haze remover. A well-stocked ceramic tile shop will carry professional-grade options that dissolve cementitious residue without harming the tile itself. Apply per the label directions and rinse completely with clean water afterward.
Mistakes Undermining Your Results
Reusing a heavily soiled mop pad. Once a pad reaches saturation, it stops collecting soil and begins distributing it. Inspect pads frequently during use. Wash them in warm water without fabric softener. Softener coats microfiber strands and eliminates the capillary action that makes them effective.
Working under direct sunlight or elevated temperatures. Rapid evaporation eliminates the window you need to dry sections by hand. Clean during cooler hours, or close window coverings to keep the surface temperature down.
Neglecting grout lines. Despite the reduced joint count on wide-slab floors, those lines still accumulate embedded grime and grout residue. After your primary mopping pass, return to each joint with a stiff nylon brush and your neutral cleaner. Scrub, then blot dry with a clean cloth.
Habits That Keep Surfaces Streak-Free Between Cleanings
Prevention is far more efficient than correction. Place heavy-duty walk-off mats at every exterior doorway and at transitions between flooring types. They intercept the grit that would otherwise scratch and soil your surface daily.
Sweep or dust-mop every day without exception. Clean up spills the moment they occur using a dry microfiber cloth. The less frequently you need to introduce water and cleaning solution, the fewer opportunities exist for streaks to develop.
Under normal household traffic, daily sweeping combined with prompt spill response means a full mop session is only necessary every week or two. When that session does come, the floor is already comparatively clean, demanding less water and less product. Staff at a ceramic tile shop often carry maintenance sprays matched to specific finishes, which can help preserve a clean surface between deeper cleaning sessions.
Wrapping It Up
Maintaining wide-slab surfaces without haze or streaks follows a disciplined sequence. Start by removing every particle of dry soil. Mix your cleaner to the exact recommended concentration. Apply with a damp mop in small, controlled sections. And always finish by drying each section manually with a clean microfiber pad. This method, applied consistently, preserves the seamless aesthetic that made these surfaces appealing from the start.

 English
 Arabic
 French
 Spanish
 Portuguese
 Turkish
 Dutch
Dutch
 Italiano
 Russian
 Romaian
 Portuguese (Brazil)
 Greek
Greek